In this post I’ll explain how to adapt the just released CoreUI template (v2.0.0), based on Bootstrap 4, to use it as a base for ASP.NET MVC Core 2.1 applications.
Although this is an ASP.NET Core MVC 2.1 specific post, the general idea should, at least, serve as a guide for other frameworks outside the .NET world.
Key Takeaways
Key concepts about handling client-side packages with npm
Understanding the relations between main views, layout views and partial views.
It’s been a little while since I wrote the first post on CoreUI and as of these dates (MAY-2018), there are new versions/release-candidates for both ASP.NET MVC Core (v2.1) and CoreUI (v2.0.0) and I’ve also become to know a little more on front-end subjects, so I thought it would be a good time to publish an updated and revised post.
The process for adapting CoreUI is going to be a bit different from the previous post, to begin with, it’s now all centered in npm, as bower and gulp have been removed from both VS and CoreUI and CoreUI is using npm’s task execution capabilities.
On the other hand, the process will be much faster thanks to a Node program I developed and submitted as a PR to CoreUI. I also expect to make the process much clearer.
As of MAY-2018, ASP.NET Core 2.1 is only supported by Visual Studio 2017 15.7 or newer.
I don’t expect this post to be too affected by the final release of all involved products, but I’ll update it in case it’s necessary.
The adaptation process becomes much easier using a file compare tool. I recommend Beyond Compare, that I’ve been using since 1998, but there are other similar tools that should work just as well.
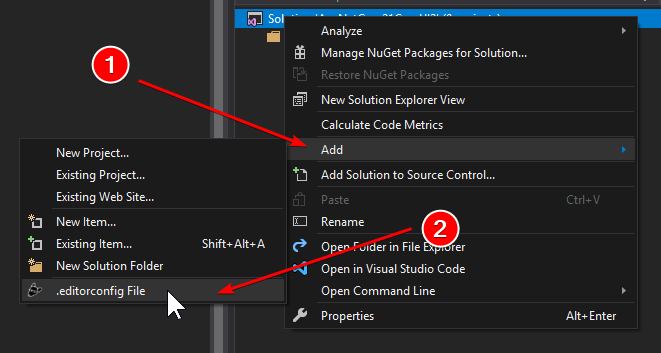
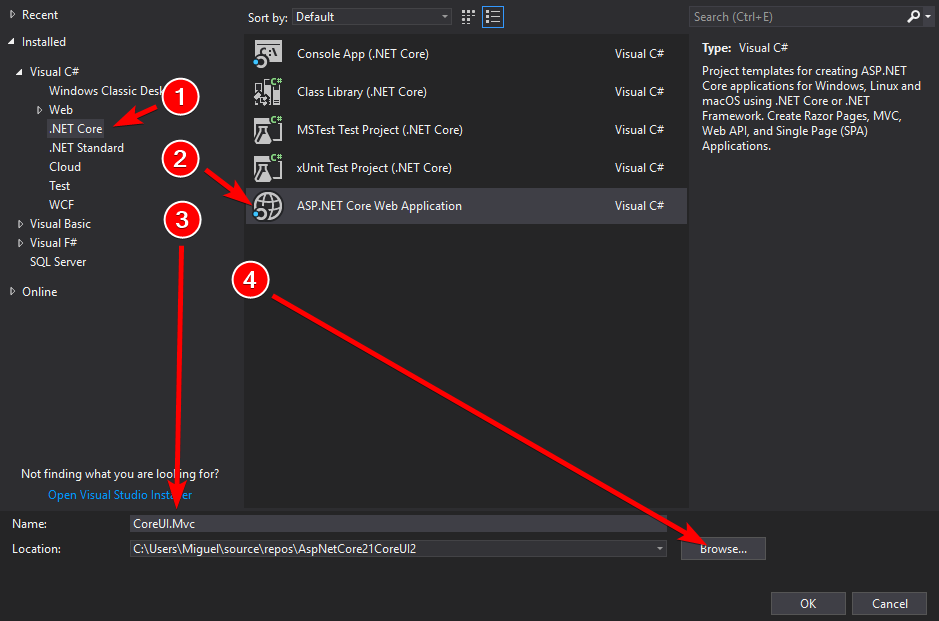
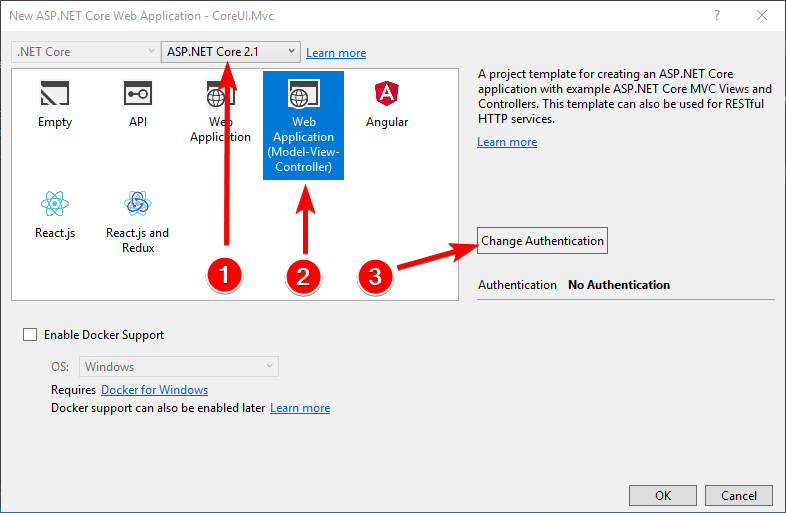
Create the CoreUI.Mvc project of type ASP.NET Core Web Application in the src solution folder.
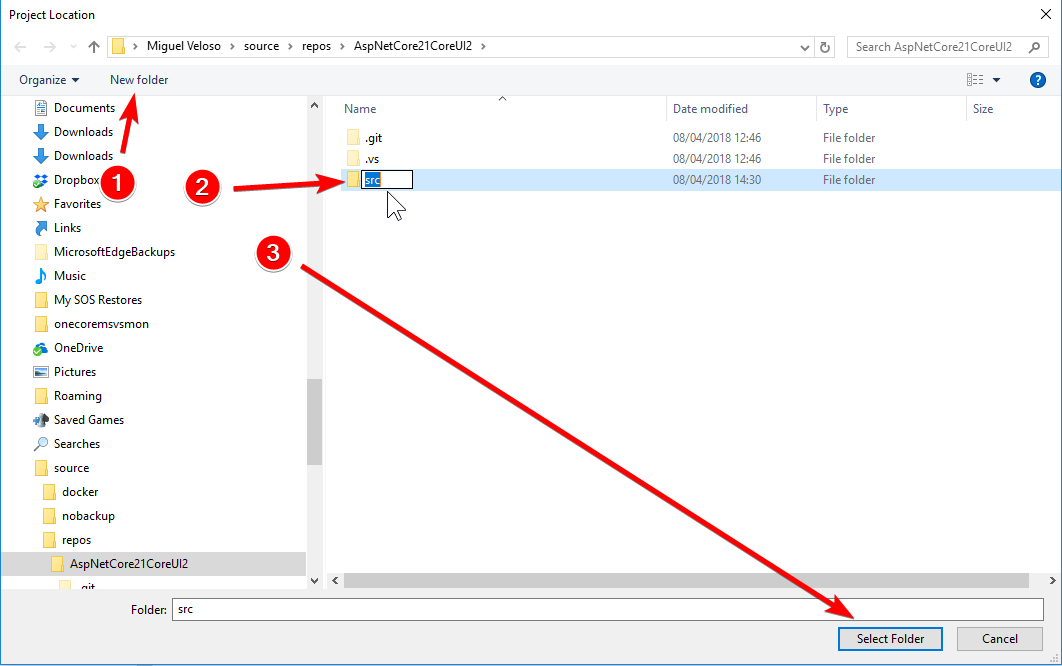
and upon browsing for the folder, create the src folder in the file system:
Select an ASP.NET Core 2.1MVC type application and
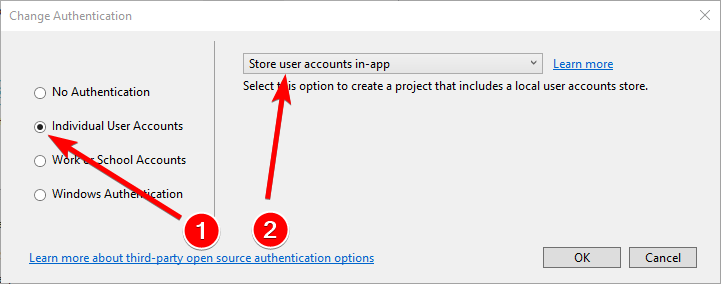
Change authentication to Individual User Accounts and Store user accounts in-app
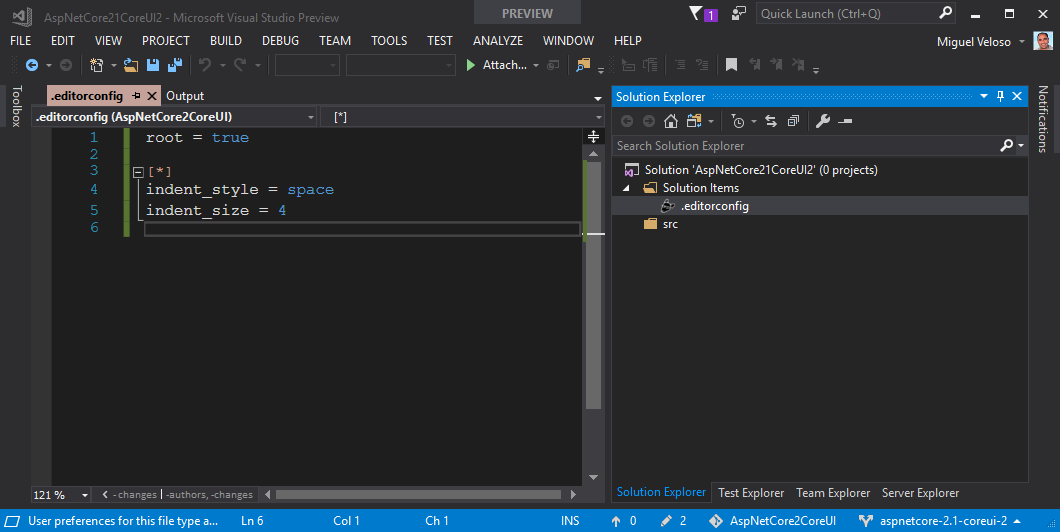
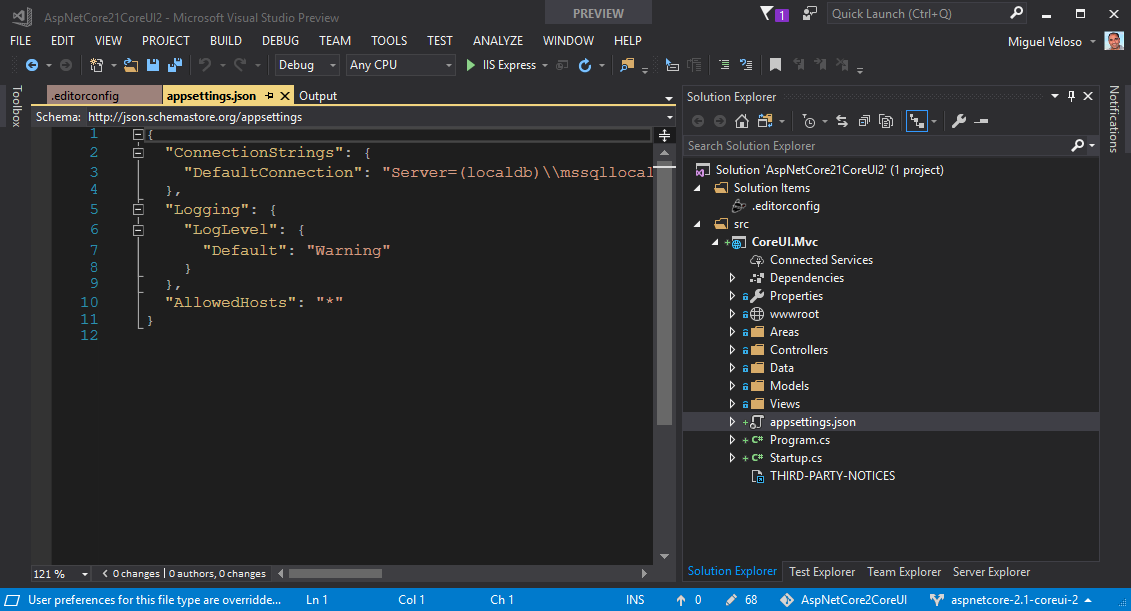
Right now your solution should look like this:
1.3 - Create the database
Change the connection string in appsettings.json file to set a nicer database name.
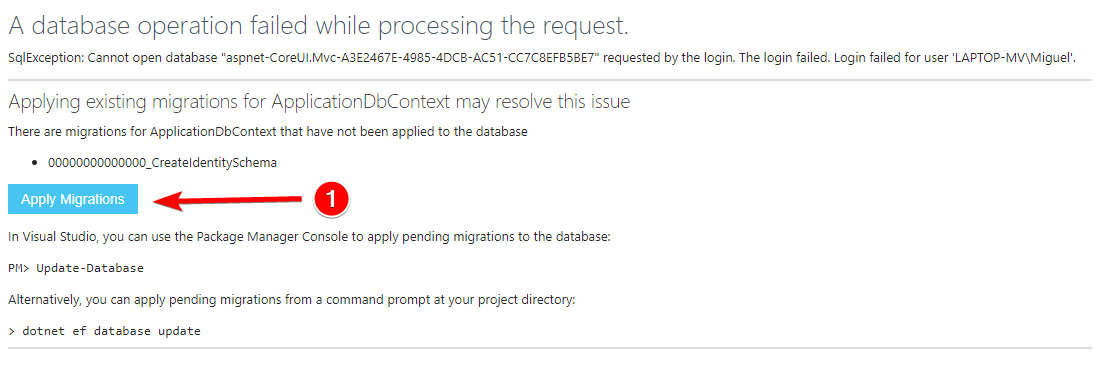
Click Apply Migrations, when you get the database missing error:
Refresh the screen (re-posting registration) when the database creation process is complete, to finish user registration
This is a good time to save the project in your repo!
1.4 - Delete original client side libraries
The wwwroot folder is the root of the application’s client-side, so all client-side static files should be within this folder tree.
We’re now going to remove all the client-side libraries included by the Visual Studio template, because we’re going to use CoreUI’s ones.
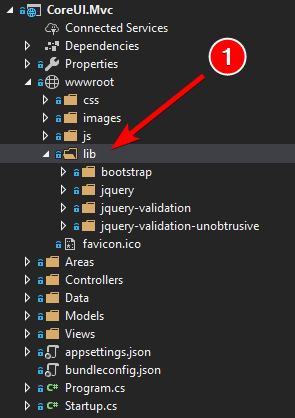
Open the wwwroot folder and make a note of the libraries used:
The bootstrap folder contains all of the “look” and general “feel” of the application, but this is what’s going to be replaced by CoreUI, so we’ll just ignore this folder completely.
CoreUI is based on Bootstrap, but creates an adapted style.css compiling Bootstrap’s .scss files.
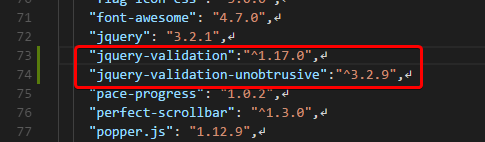
The jquery* libraries are used for client side interactivity and validation, so we will later add them to the MVC CoreUI app, but we’ll just take a note of the libraries used, we can check the versions in the .bower.json file in each folder, in this case:
jquery (3.3.1)
jquery-validation (1.17.0)
jquery-validation-unobtrusive (3.2.9)
Delete the wwwroot\lib folder.
(If you can’t delete the lib folder, you might need to close VS and do it from the file explorer.)
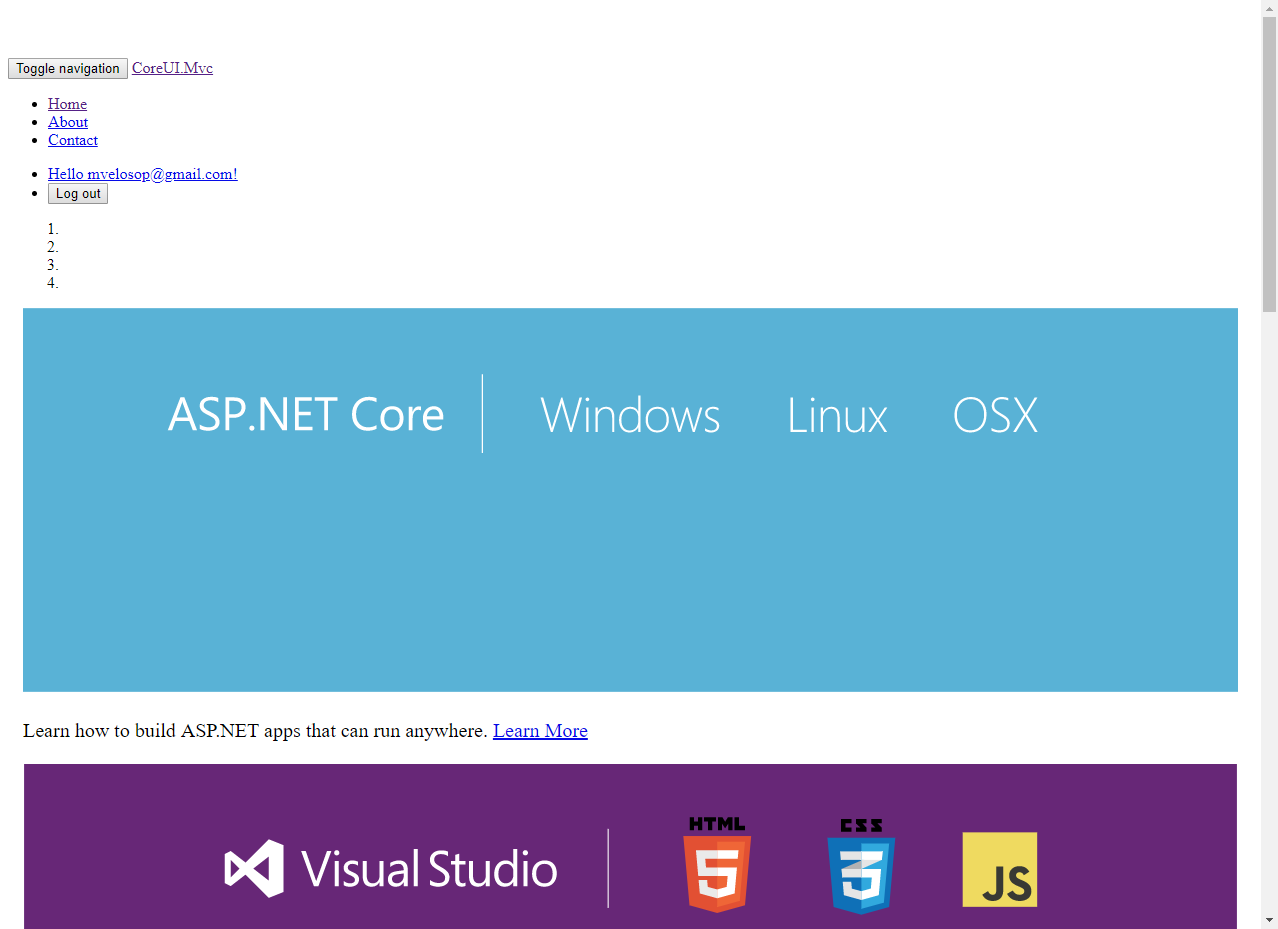
Run the application with [Ctrl]+[F5] to display it without any style (or Javascript)
Let’s save this version to the repository now
2 - Prepare the CoreUI deployment site
We’re now going to prepare a deployment (distribution) site from the latest version of CoreUI, which we’ll later copy to our ASP.NET Core MVC application.
My fork adds a set of Node (Javascript) programs to generate basic Razor views from CoreUI’s static html files, with just one command.
I’ve already submitted a PR to include this in the master CoreUI repo but, in the mean time, I’m guessing you will prefer the express route, so I’ll explain the steps assuming your are cloning my fork of CoreUI.
Anyway in this section (#2) you should get about the same results from both repositories, section #3 is where the big differences will show.
So, let’s start by cloning my fork, from the command line execute:
In my fork, the default branch is aspnetcore (ASP.NET Core MVC specific), the default branch in the master repo is master.
We’ll now create a new branch to do our customizations, let’s call it dist, so:
1
2
cd ./mvelosop-coreui-free-bootstrap-admin-template
git checkout -b dist aspnetcore
2.2 - Create the distribution folder (standard static files)
First we need to install client-side dependencies, so, from the coreui-free-bootstrap-admin-template folder, execute this command:
1
npm install
That creates the node_modules folder with all dependencies, as configured in the dependencies collection in the package.json file.
My fork adds some scripts to package.json, and required additional packages:
build-aspnetcore : This is the one that makes the magic, and
test : This is the one that makes sure the magic is fine ;-)
Execute this command to verify the site is working properly:
1
npm run serve
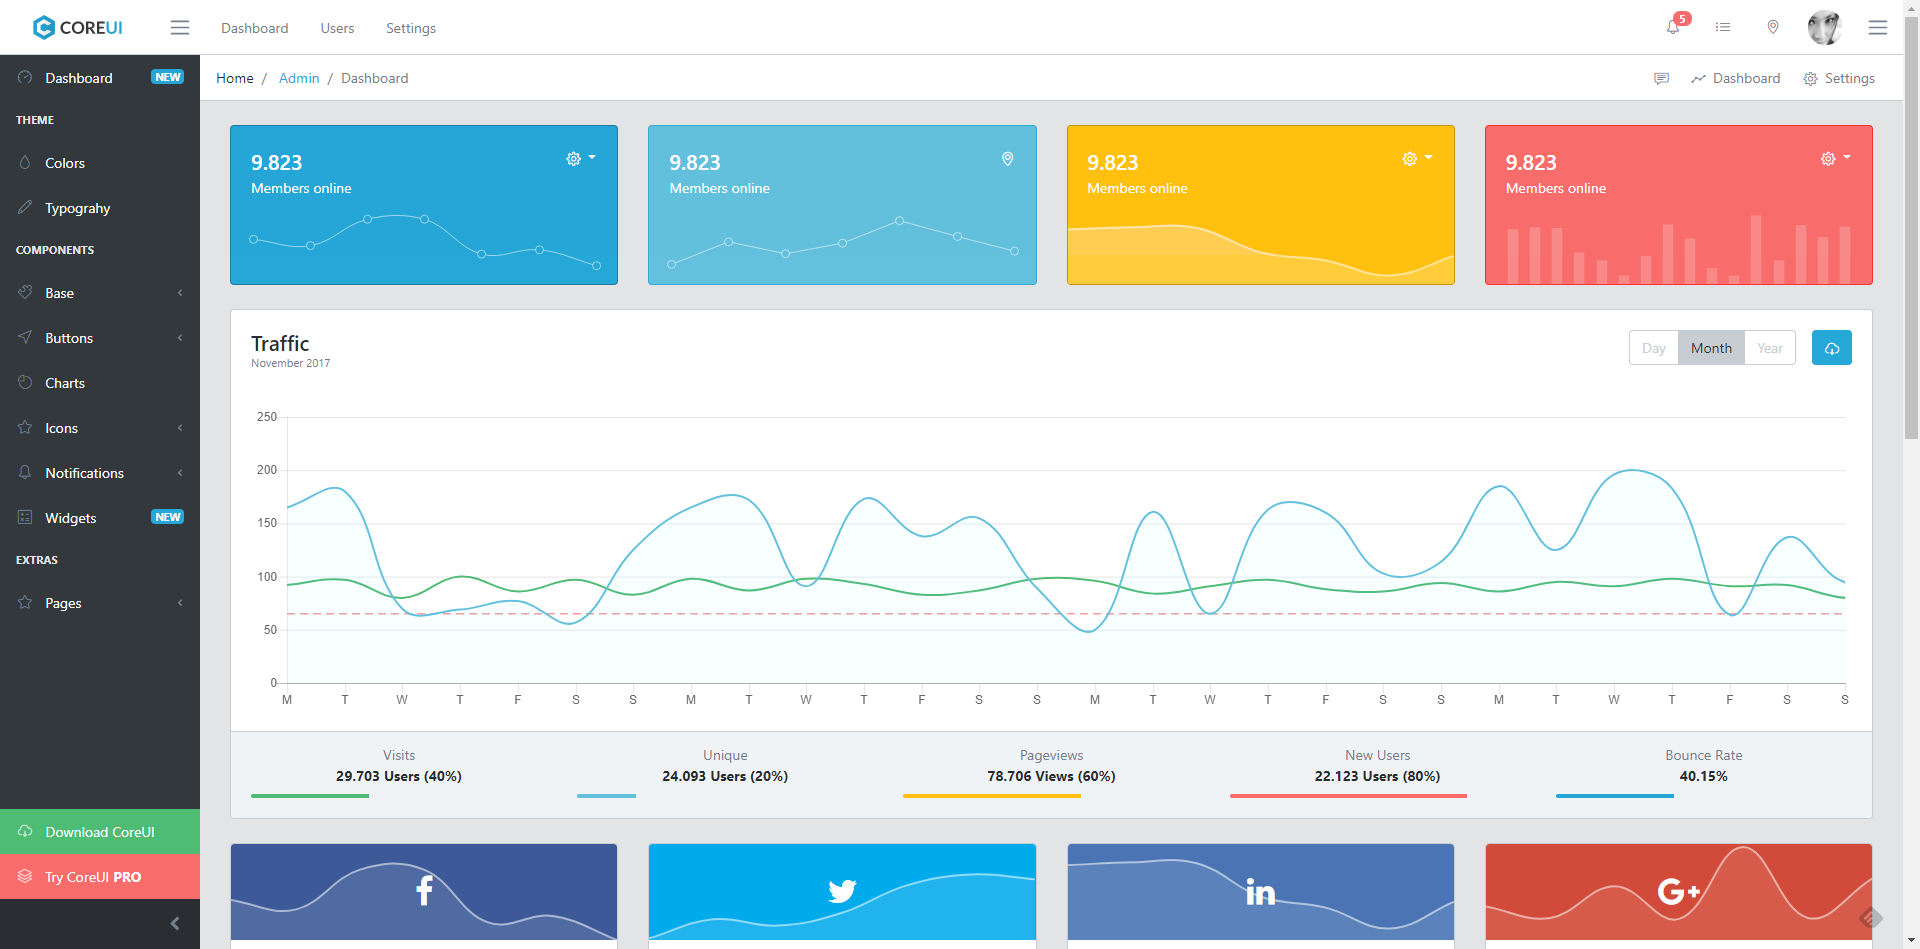
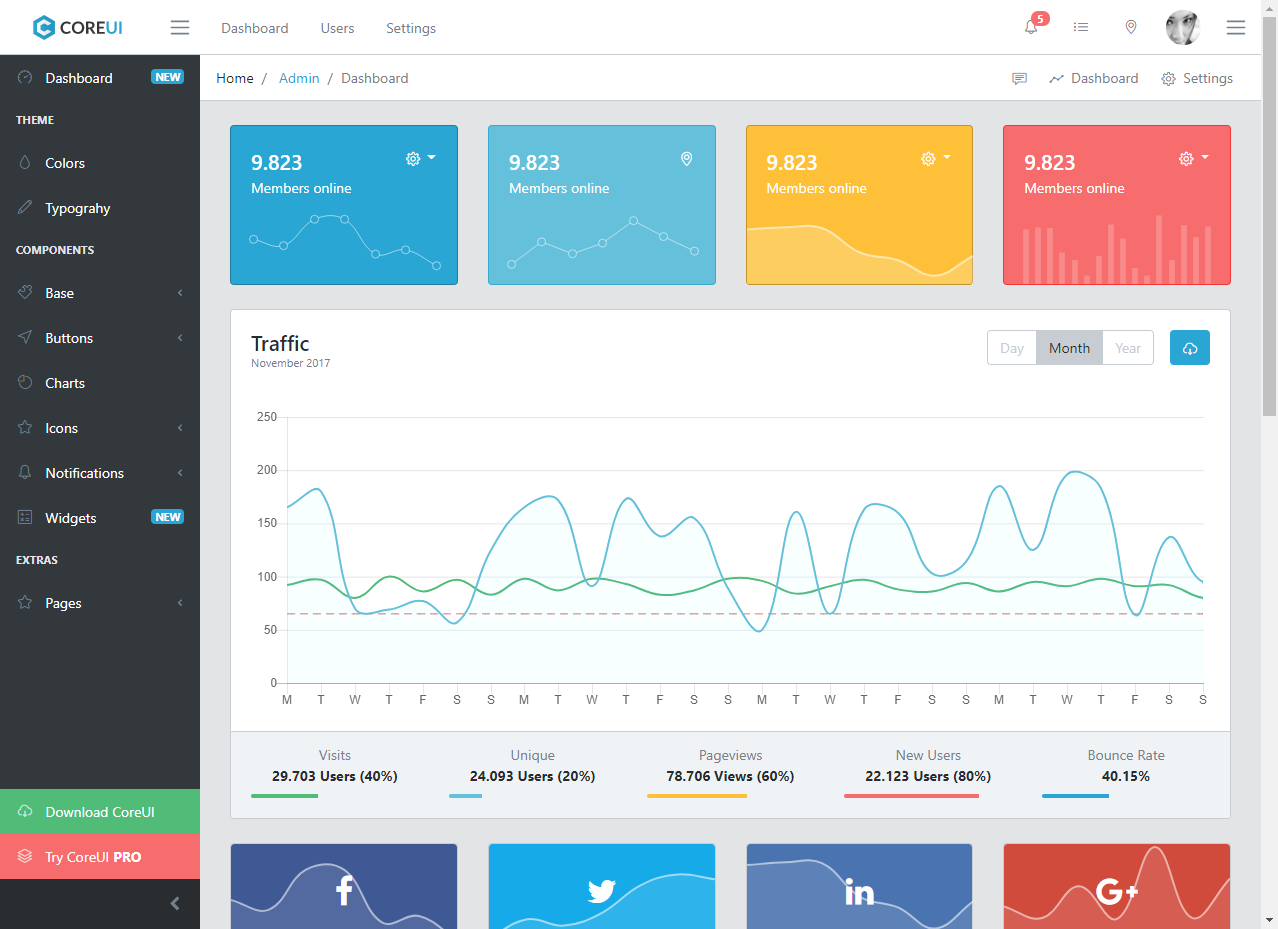
That should open your default browser at http://localhost:3000/ where you should see something like this:
To finally generate the distribution folder we just need to execute the command (after interrupting the node server with [Ctrl]+[C]):
1
npm run build
That creates the dist (.gitignore’d) folder inside the repo folder with something like this:
This is the base static deployment site, ready to be published, and by just double-clicking any html file (except 404, 500, login or register) you can explore the base CoreUI template.
Up to this point, you will get the same result either with the master repo or my fork.
2.3 - Create the distribution folder for ASP.NET Core MVC
Similar to what we just did, to create the distribution folder for ASP.NET Core MVC, when cloning my fork, you just need to execute:
1
npm run build-aspnetcore
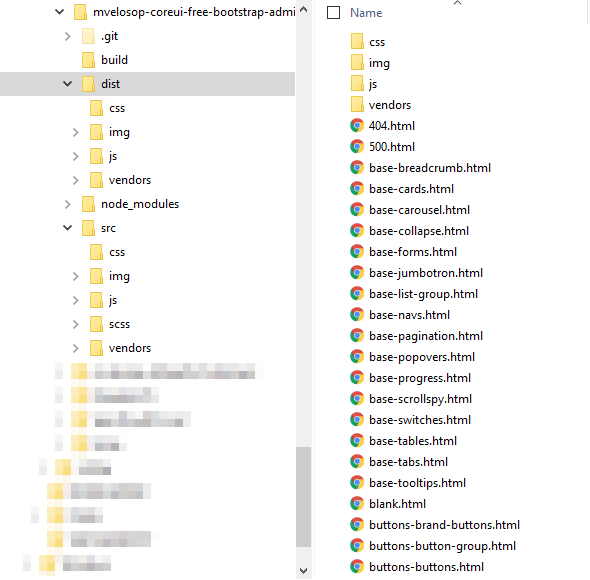
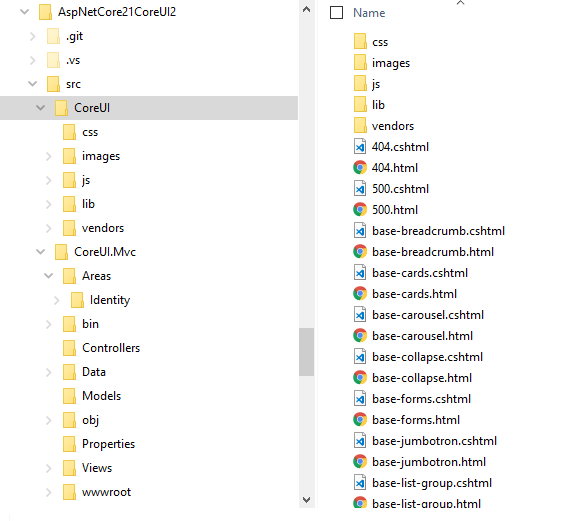
This command clears the previous dist folder and generates something like this, following the conventions of ASP.NET:
Where we can highlight the following:
The images are now in the images folder instead of img
The files from required packages are in the lib folder instead of vendors
The lib folder is now organized just like node_modules (but including only the files actually referenced, plus any existing and required .map file)
A Razor view (.cshtml) for each static html file of CoreUI.
Just like before, we can double-click any html file (except 404, 500, login or register) to explore the base CoreUI template, with the ASP.NET Core MVC folder structure.
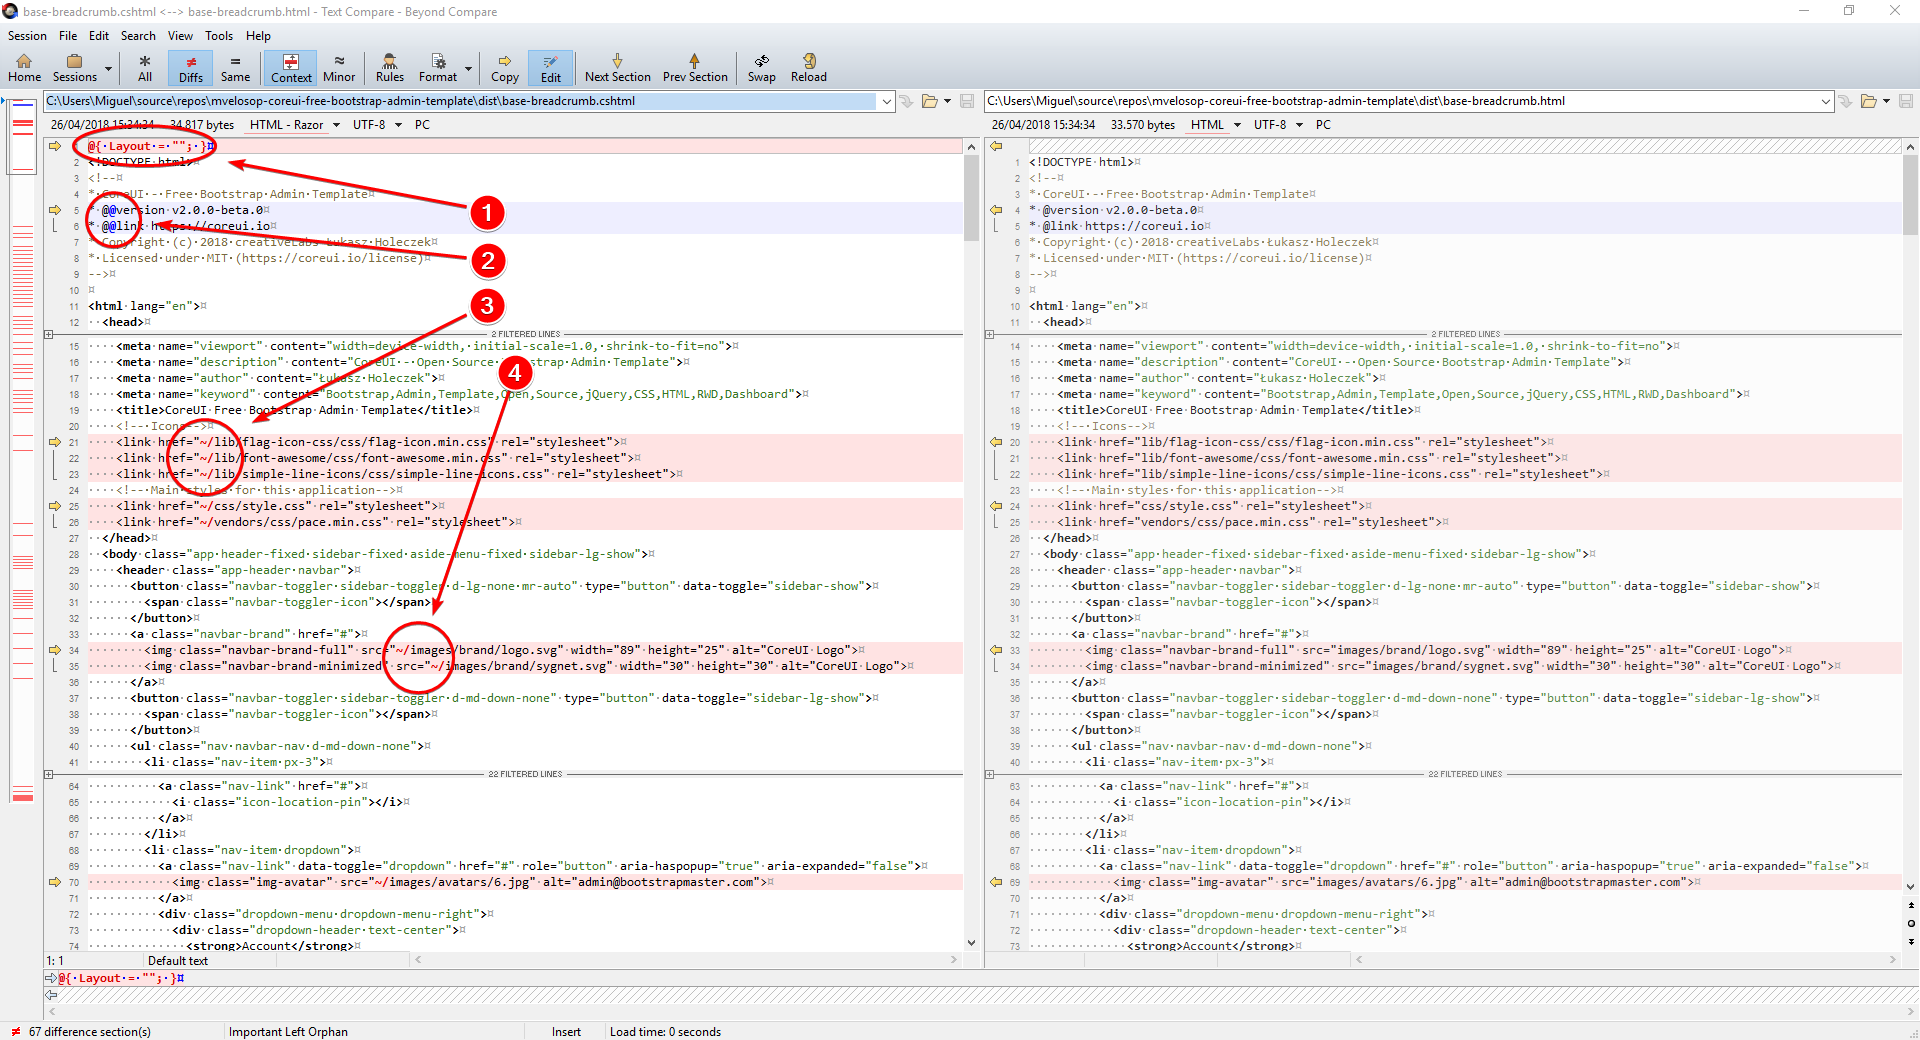
If we open a pair of .html/.cshtml file with Beyond Compare, or a similar diff tool, we can check the differences to understand the changes that the build-aspnetcore script does:
Clear the default layout because (at this moment) the page has all it needs
Escape the @ character (a Razor reserved symbol)
Add the “home” route prefix ~/ for css and js files
Add the “home” route prefix ~/ for images and all other static files
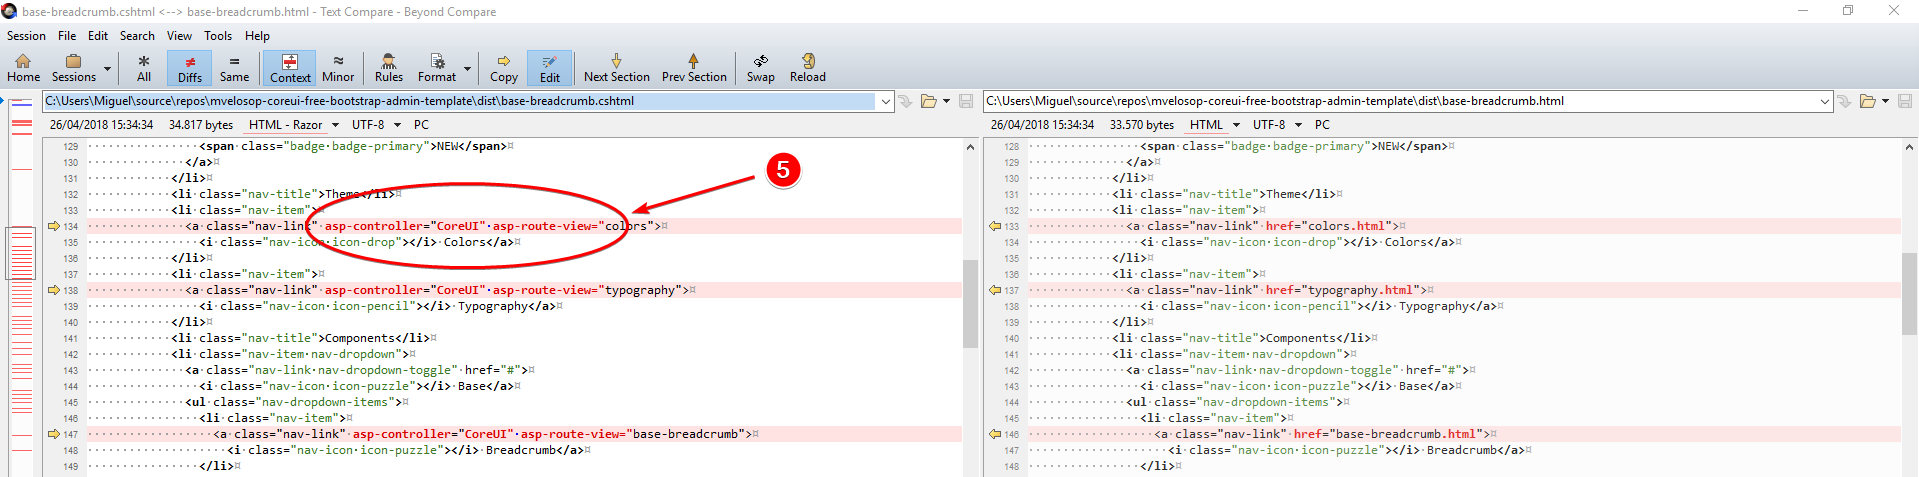
Change links to html files, to point to ASP.NET controller actions using Razor tag helpers
If you weren’t using the build-aspnetcore script from my fork, you’d have to make those changes by hand on each and every html file.
2.4 - Install the dependencies for client-side ASP.NET MVC views
We will now install the dependencies identified in 1.4.
To install the dependencies we just have to add these lines to the dependencies collection on packages.json, referencing the latest versions of the packages:
If you prefix a version number with the caret symbol ^, the minor version and update number might change every time you run the install command.
Then, we have to install the new dependencies using:
1
npm install
Besides installing the libraries in node_modules, we also have to copy the libraries used on the Razor views to the dist/lib folder, so one of the tasks of build-aspnetcore is to copy all files from node_modules referenced in the views to the lib folder.
To achieve that we create file vendors.html (or whatever) in CoreUI views folder to include the files we’ll be referencing from the app’s Razor views, like this:
<!DOCTYPE html><html><head><metacharset="utf-8"/><title>Vendor list</title></head><bodystyle="font-family: Arial, Helvetica, sans-serif; font-size: 18px;"><h3>Files to deploy to dist/lib</h3><ul><li>"lib/jquery-validation/dist/jquery.validate.min.js"</li><li>"lib/jquery-validation/dist/additional-methods.js"</li><li>"lib/jquery-validation/dist/localization/messages_es.js"</li><li>"lib/jquery-validation-unobtrusive/dist/jquery.validate.unobtrusive.min.js"</li></ul></body></html>
This file will be scanned during the build/build-aspnetcore command, just like all other CoreUI views, to select the files that will be copied from node_modules to dist/lib.
It is important (for the script to work) to include the relative path and filename, from the home folder, including the very same “node_modules” folder, in quotation marks.
The program will also include the related .map file (if it exists).
So we can now create/update the distribution folder with:
1
npm run build-aspnetcore
Client-side package managers.
At some point you might want to use some specialized client-side package manager, like WebPack, but we won’t cover that in this post.
2.5 - Copy the distribution folder into the solution
Now we’ll just copy the contents of the dist folder into the new src\CoreUI folder of our solution.
The src\CoreUI will be our reference folder we’ll use to compare to new versions of CoreUI, when they become available, to update the components in our application as needed.
The VS solution should now look like this:
In a moment we will merge that src\CoreUI folder to our app’s wwwroot and Views folders.
This is an excellent time to commit to your local repo!
src\CoreUI is not part of the Visual Studio solution.
Notice that, although src\CoreUI is within the solution’s folder structure and under source control, it’s not part of the Visual Studio solution, i.e. you will not see it in the solution explorer.
3 - Integrate the CoreUI reference folder into the MVC application
We’ll do a basic integration first, just to verify all Razor views work properly:
Copy all static files, other than .html, to the wwwroot folder
Create a generic controller to display all Razor views
Copy the Razor views to the controller’s Views folder
Then we’ll rearrange the views using partials to make it more like a standard Razor MVC app.
This is where a tool like Beyond Compare really shines, specially when it’s time to update the files to new versions of CoreUI.
3.1 - Copy static files to wwwroot folder
So we have to copy these folders from src\CoreUI to src\CoreUI.Mvc\wwwroot:
css
images
js
vendors
This vendors folder actually contains CoreUI specific css files, but I just didn’t want to change any of the standard scripts from the template.
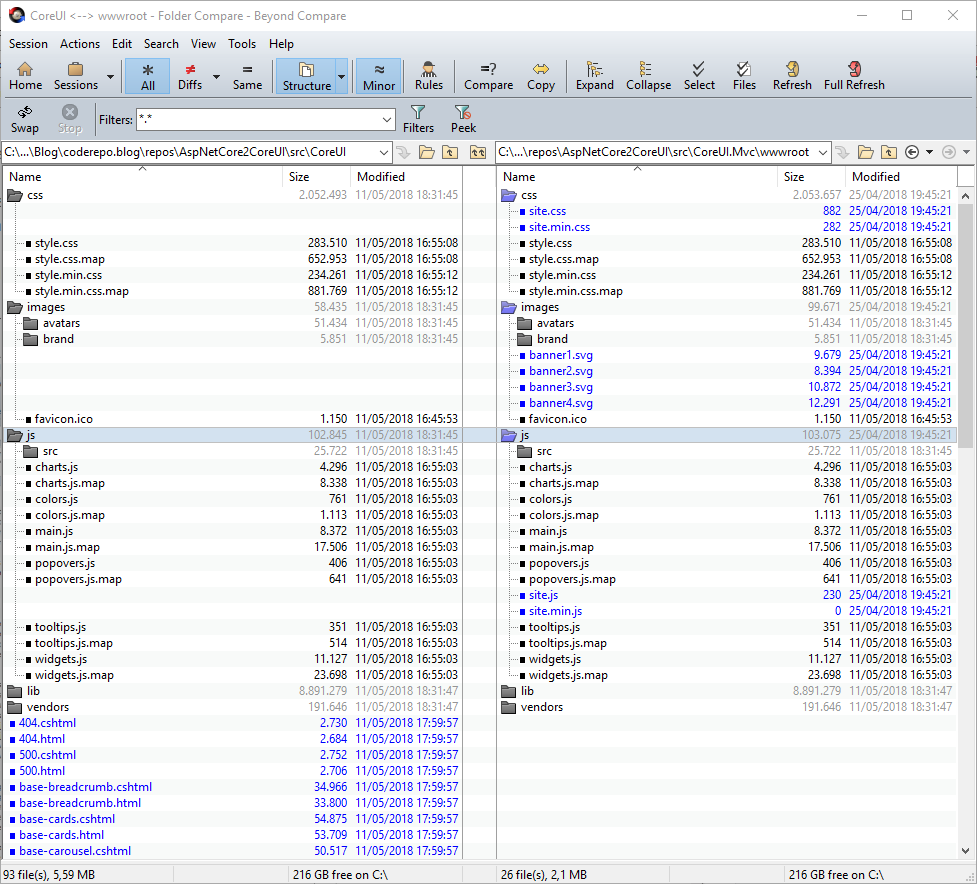
If using Beyond Compare, the result should be something like this:
3.2 - Create a generic controller for CoreUI views
Next we’ll create a simple controller to display any of the CoreUI Razor views (*.cshtml), that just receives the name of the view to display.
We also need to create the corresponding Views\CoreUI folder for the Razor views for this controller.
3.3 - Copy the Razor views to the Views\CoreUI folder
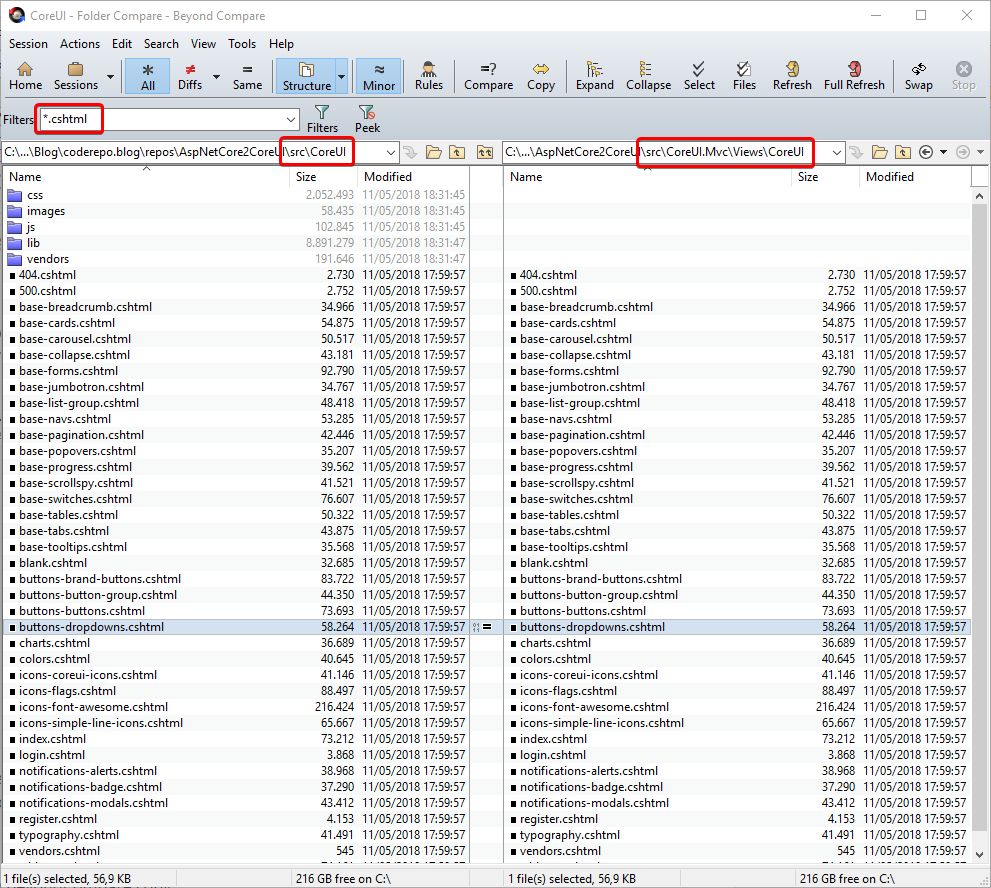
Using BeyondCompare copy the generated Razor views from the CoreUI reference folder to the Views\CoreUI folder:
3.4 - Run the app
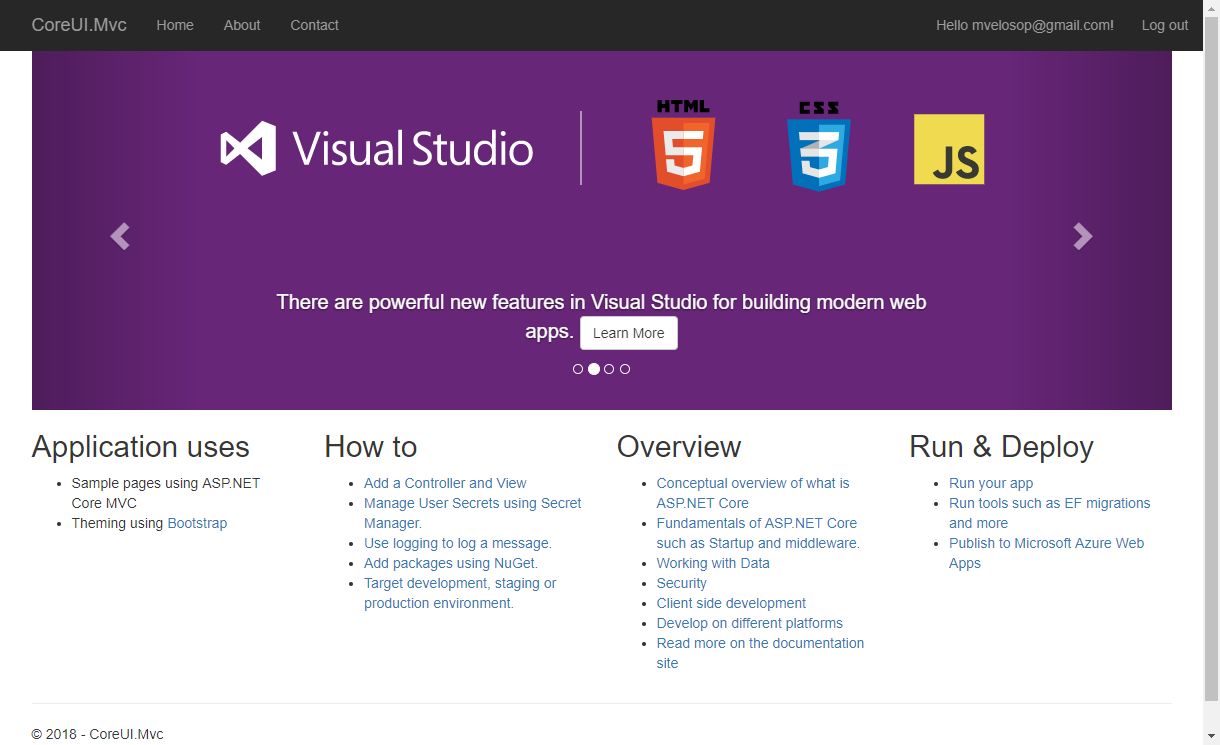
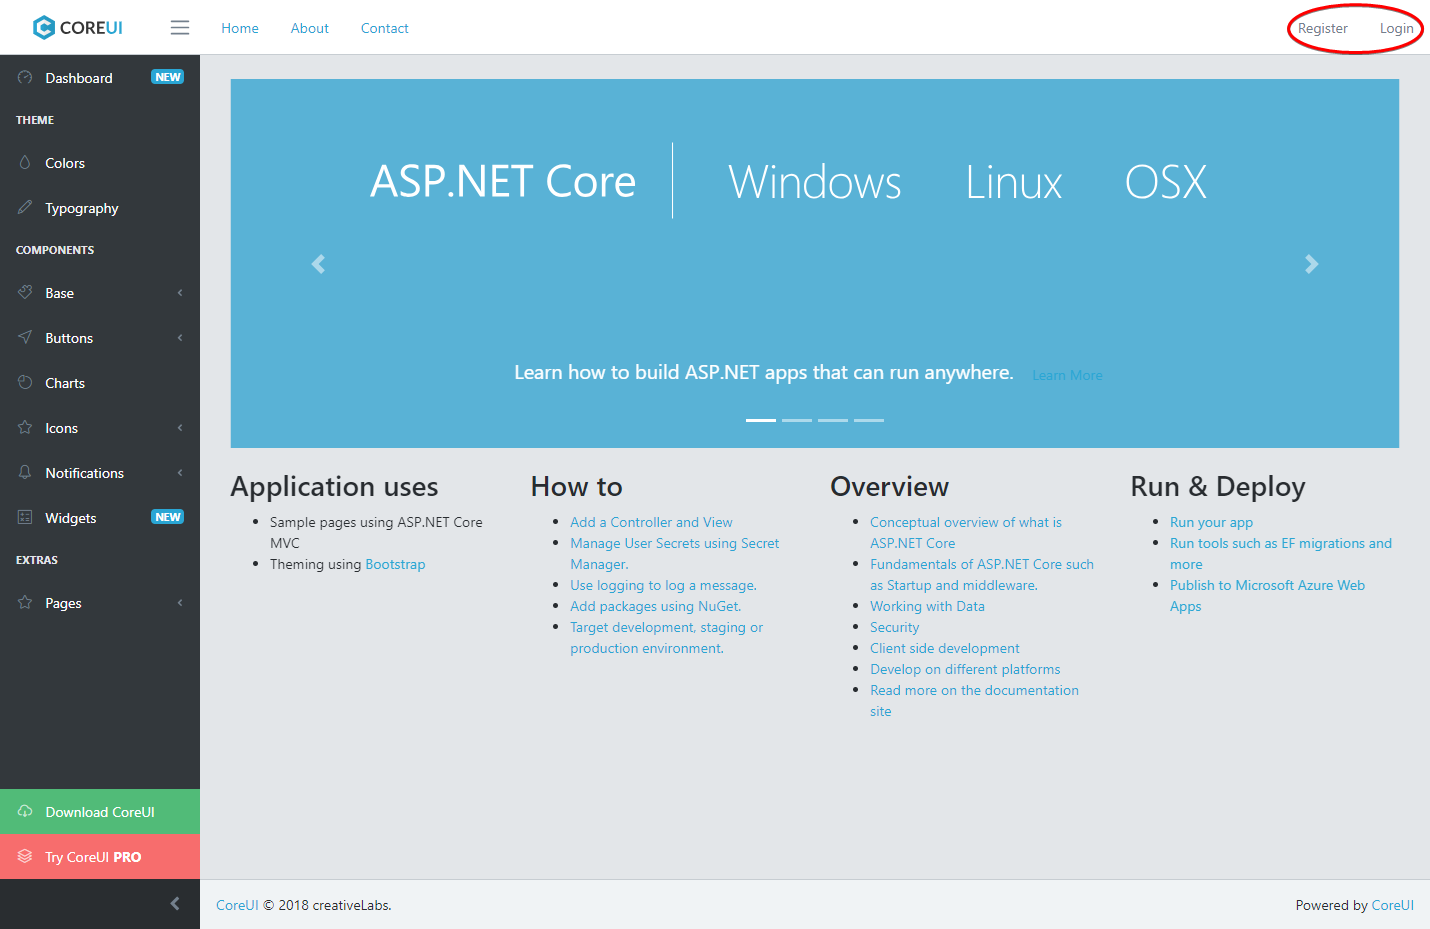
You should now be able to run the application with [Ctrl]+[F5] and when navigating to https://localhost:#####/CoreUI/Index (##### = port assigned by VS) to get this:
You should be able to navigate to any page of the template and all requests will be handled by the controller, which you can verify in the address bar.
Once again, this is a great time to commit your work.
3.5 - Create a _Layout view
When working in Razor, the rendered page usually has, at least, two parts:
The content, which is the core of whatever you want to show at any one time, e.g. the Index page, and can be named whatever makes sense, e.g. Index.cshtml.
The layout, that “surrounds” the content and is usually named _Layout.cshtml, but is just another Razor view we use differently.
Correlating this to the generated CoreUI Razor views, it’s easy to realize that for any view (except 404, 500, login and register):
The layout is equivalent to blank.cshtml
The content is equivalent to the difference between the view and blank.cshtml
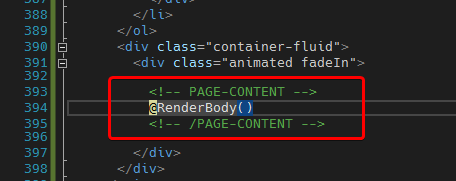
So let’s begin by copying blank.cshtml to _Layout.cshtml and adding the render body helper in _Layout.cshtml like so:
In ASP.NET MVC, when we request a view from the controller, the render engine:
Finds the requested view
Finds the configured layout for the view
Renders the layout inserting the view content at the @RenderBody() helper
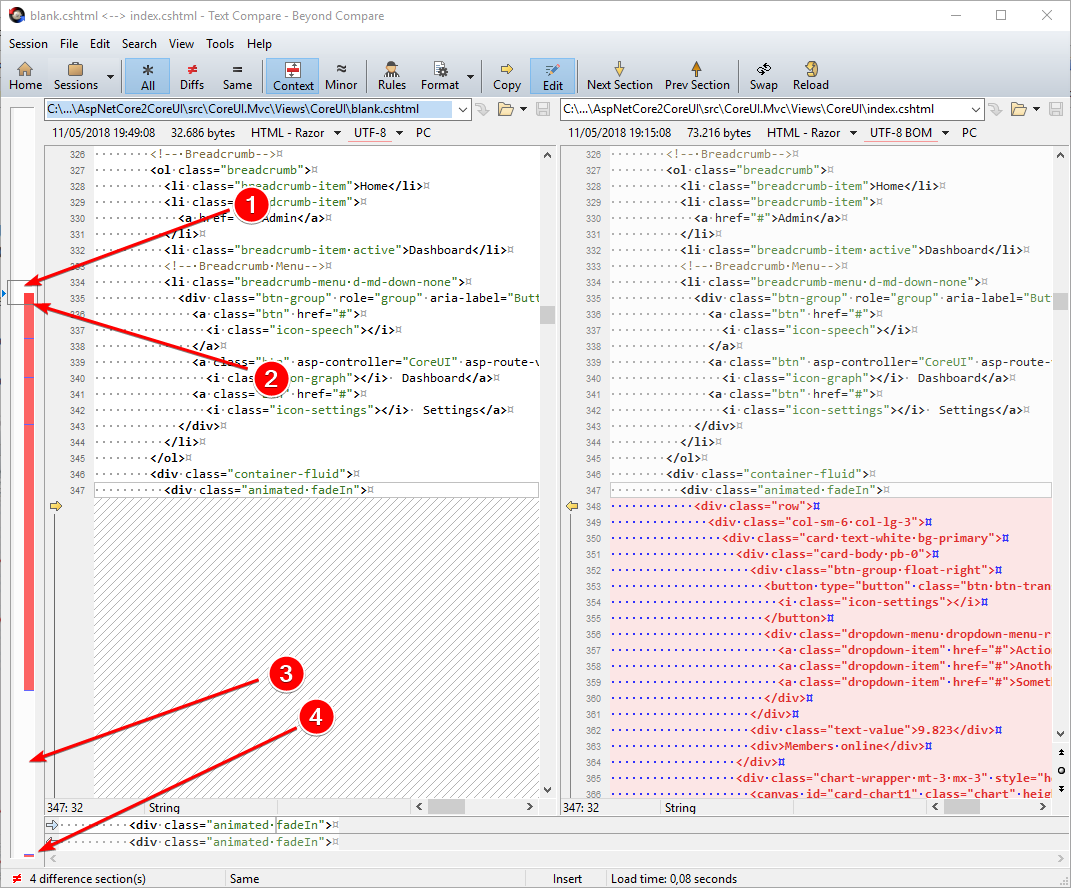
So let’s compare now blank.cshtml (left) to index.cshtml (right), you should get something like this:
On the left thumbnail view we can identify four zones:
Before the index content zone both files are identical
In the index content zone the blank.cshtml has no lines
After the index content zone both files are identical again
There are a few additional lines at the end of the index.cshtml file
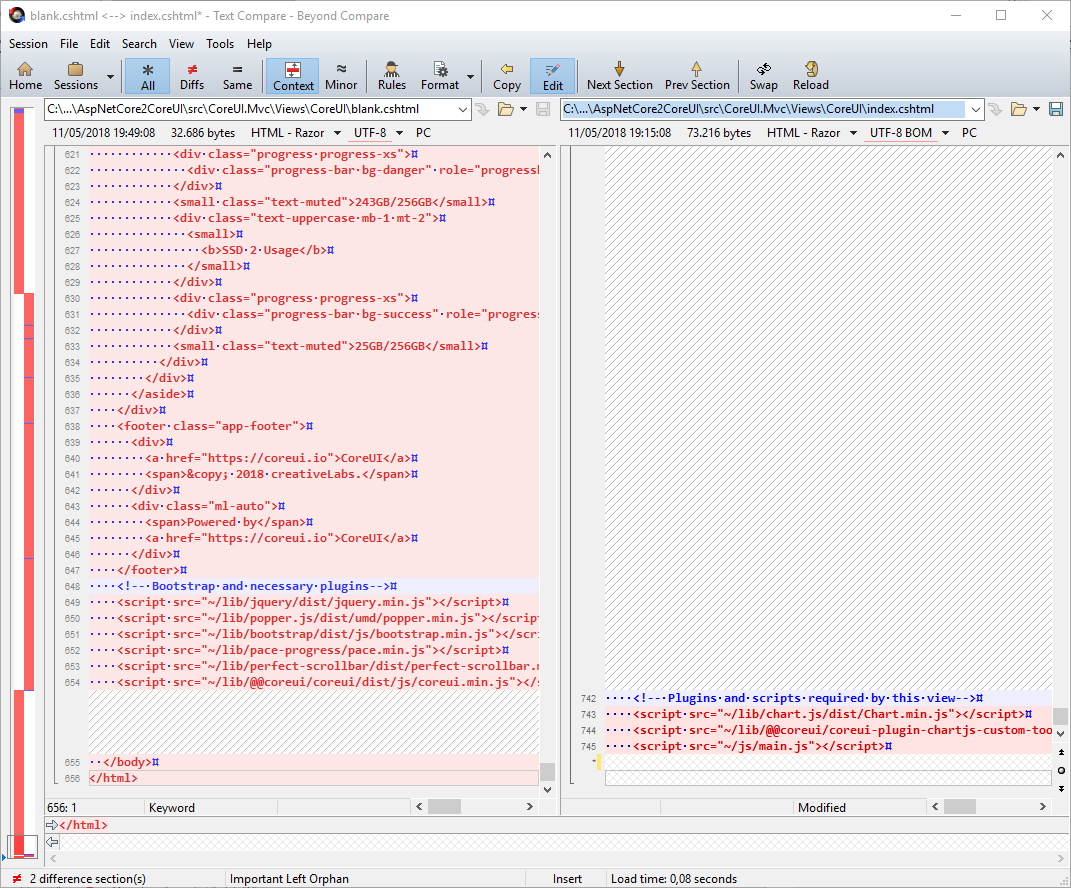
So when deleting the common lines from zones 1, 2 and the last two lines on the index.cshtml file (on the right side) you should get to this:
Notice the four lines at the end that exist only in index.cshtml.
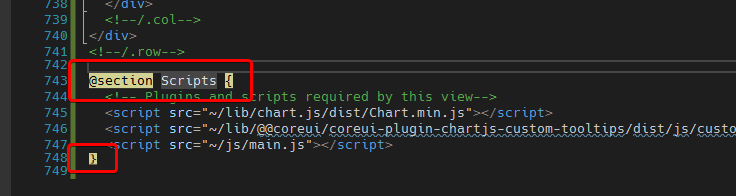
The way to handle that is creating a Scripts section in the index.cshtml file and adding a call to the RenderSection helper in the _Layout.cshtml.
After fixing that, the last lines of Index.cshtml should be:
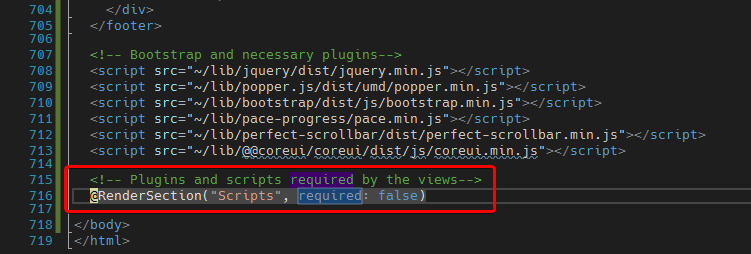
And now the last lines of _Layout.cshtml should be:
Which looks just like before, only this time we have separated content from layout.
Try commenting out the @RenderBody() line we added to _Layout.cshtml to check what happens, in case it’s not clear at this point.
You can also search for the content marker comments we added to _Layout.cshtml.
This is another good time to commit your work
3.6 - Convert the rest of the CoreUI Pages
You can now repeat the process with the rest of the CoreUI pages, except for 404, 500, login and register, that don’t have a layout.
There are a couple of additional details, but I will not cover them here, you can take a look at the final views in the repo.
3.7 - Componentize the _Layout view
It’s not practical to have a massive 700+ lines _Layout view, so it’s best to split it into smaller components.
I will not go through the whole process here, but will only show the final result, including the merge with the default ASP.NET Core MVC _Layout.cshtml file, that you can find in the Views\Shared folder and you can check all details in the post’s repo:
It’s worth noting that the Breadcrumbs are handled as a section in the view, rather than as a partial view, because they are probably tied the view. I case they are not, you should now be able fit it to your needs.
Anyway we’ll view in a moment about an interesting way to handle this using nested layouts.
Then again this is a great time to commit your work
4 - Integrate CoreUI views and MVC application
There are just a few steps missing to finishing the integration with the ASP.NET Core MVC application.
Move _Layout.cshtml and partials to the Views\Shared folder
Display the standard MVC views with the new _Layout.cshtml
Integrate Account views with CoreUI template
Item #1 is sort of trivial, only worth noting that the _app-header-nav.cshtml view will now contain the original ASP.NET Core MVC menu:
You can, of course just set this to whatever best fits your needs.
Also worth noting here, is that item #2 just happens because the views layout is configured to be _Layout.cshtml in:
_ViewStart.cshtml
[AspNetCore2CoreUI-2.0] src\CoreUI.Mvc\Views\
1
2
3
@{
    Layout = "_Layout";
}
But we don’t want (just for fun) to display the breadcrumbs view in the standard ASP.NET MVC views.
We will solve this using “nested layouts” to check a nice ASP.NET MVC feature.
4.1 - Applying nested layouts for breadcrumbs
When splitting up the layout it became evident that needed something special to handle the breadcrumbs, as they are something that has to adapt to the context, probably for every view.
So it was kind of obvious that breadcrumbs should be a section on the view, but adding it to all CoreUI views was kind of tedious.
So an interesting solution for this was adding a local layout on the Views\CoreUI folder to include the breadcrumbs and separate the breadcrumbs items and menu, like this:
So, not surprisingly, this is the resulting blank.cshtml view, noting all sections shown there are just markers and optional, i.e. can be omitted completely.
If we now go back to https://localhost:#####/CoreUI/Index, we’ll see the same view, but this time as a composition of the main content on the layout and the partial views.
And now with the MVC menu on the top bar and the breadcrumbs only in the CoreUI views.
4.2 - Integrate Account views from Identity
Customizing Identity 2.1 UI views.
Starting with ASP.NET Core 2.1 there is new feature that allows including Razor views in class libraries, so the views are no longer generated, so you have to follow this procedure to customize them in case you need it.
Just one more step to finish, so the standard Identity views integrate nicely with CoreUI.
I will not get into the details here, but the “high” level steps, using _LoginPartial.cshtml as a guide, are:
Show all user related elements in the _app-header.cshtml partial only when the user is logged in and
Add link to Profile and Logout options in _user-nav.cshtlm partial and, finally
Delete _LoginPartial.cshtml
So the final result, when the user is not logged in should like this:
To display the navigation options for the user profile view I had to customize the Account\Manage\ManageNav view to apply the correct CoreUI classes like so:
Plus some other details you can better check in the repo.
To get a profile view like this:
So, at this point, I think a good starting point for an elegant and attractive user interface for your next project.
Summary
In this article we looked in quite detail at the process for adapting the latest version of CoreUI HTML template to ease the development of attractive ASP.NET Core MVC 2.1 applications.
I hope you've found this post useful and invite you let me know your opinion in the comments section.