This is the first article in a series about Adaptive Dialogs in Bot Framework v4. It’s an open-ended list at this point, so I’ll update it as needed.
- Getting started with Adaptive Dialogs in Bot Framework v4 (This article)
- Integration Testing with Adaptive Dialogs in Bot Framework v4
Source code
TL;DR;
In this article we create a simple echo bot with logging and integration testing, to set up a nice, TDD-based stage, to convert the bot to an adaptive dialogs bot in the next post.
We’ll use logging as a learning resource, that’ll help us get a better global understanding of a bot. Serilog will be the log system and Seq the centralized log server.
We begin the series with the SDK release 4.12.2 and we’ll be updating it as we go along.
Overview
Adaptive Dialogs is a relatively new Bot Framework technology, it became generally available (GA) in May 2020, and allows you to define dialogs in declarative fashion. This technology also includes the powerful Adaptive Expressions and Language Generation.
Besides, Adaptive Dialogs are the cornerstone of the Bot Framework Composer but you can also use them in plain old-style code, which the way we’ll get started. I expect to cover Composer at least in one post later in this series.
Adaptive Dialogs might seem a bit daunting at first, specially if you come from Bot Framework SDK v3 or before SDK v4 release 4.9 but they’ll help your write a lot less boilerplate code, so you’ll end up being more productive.
However, there’s a catch, Adaptive Expression are string-based. That means that you’ll code them as strings and you’ll feel the lack of intellisense, at least in Visual Studio (there’s some support for them in Visual Studio Code). You might even feel like working with Javascript in Notepad 😨. This all means you’ll end up needing tests to make sure your bot works as expected, avoid regressions, and even to develop faster, so that’s why we begin with a testing focus.
The initial article became too large, so I had to split it.
In this article we will:
- Create a simple echo bot using the Bot Framework Templates for Visual Studio (VS).
- Set up an integration tests project for the echo bot.
I’ll be omitting the required “usings”, at least most of the times. I’ll also focus on the key parts of the code, you’ll find all the details of each step in the repo, as separate issues, branches, and the related pull requests (PRs).
Let’s get started 😀
Implementation
1 - Create a simple echo bot with logging
In this step we’ll create a starter bot setting up some solution folder structure to add the integration tests later on, so we’ll:
- Create a .NET Core 3.1 Echo bot
- Add logging
- Add a bot logging middleware
1.1 - Create a .NET Core 3.1 Echo bot
Create a branch for the post
Clone the repo and create a branch at tag start-01.
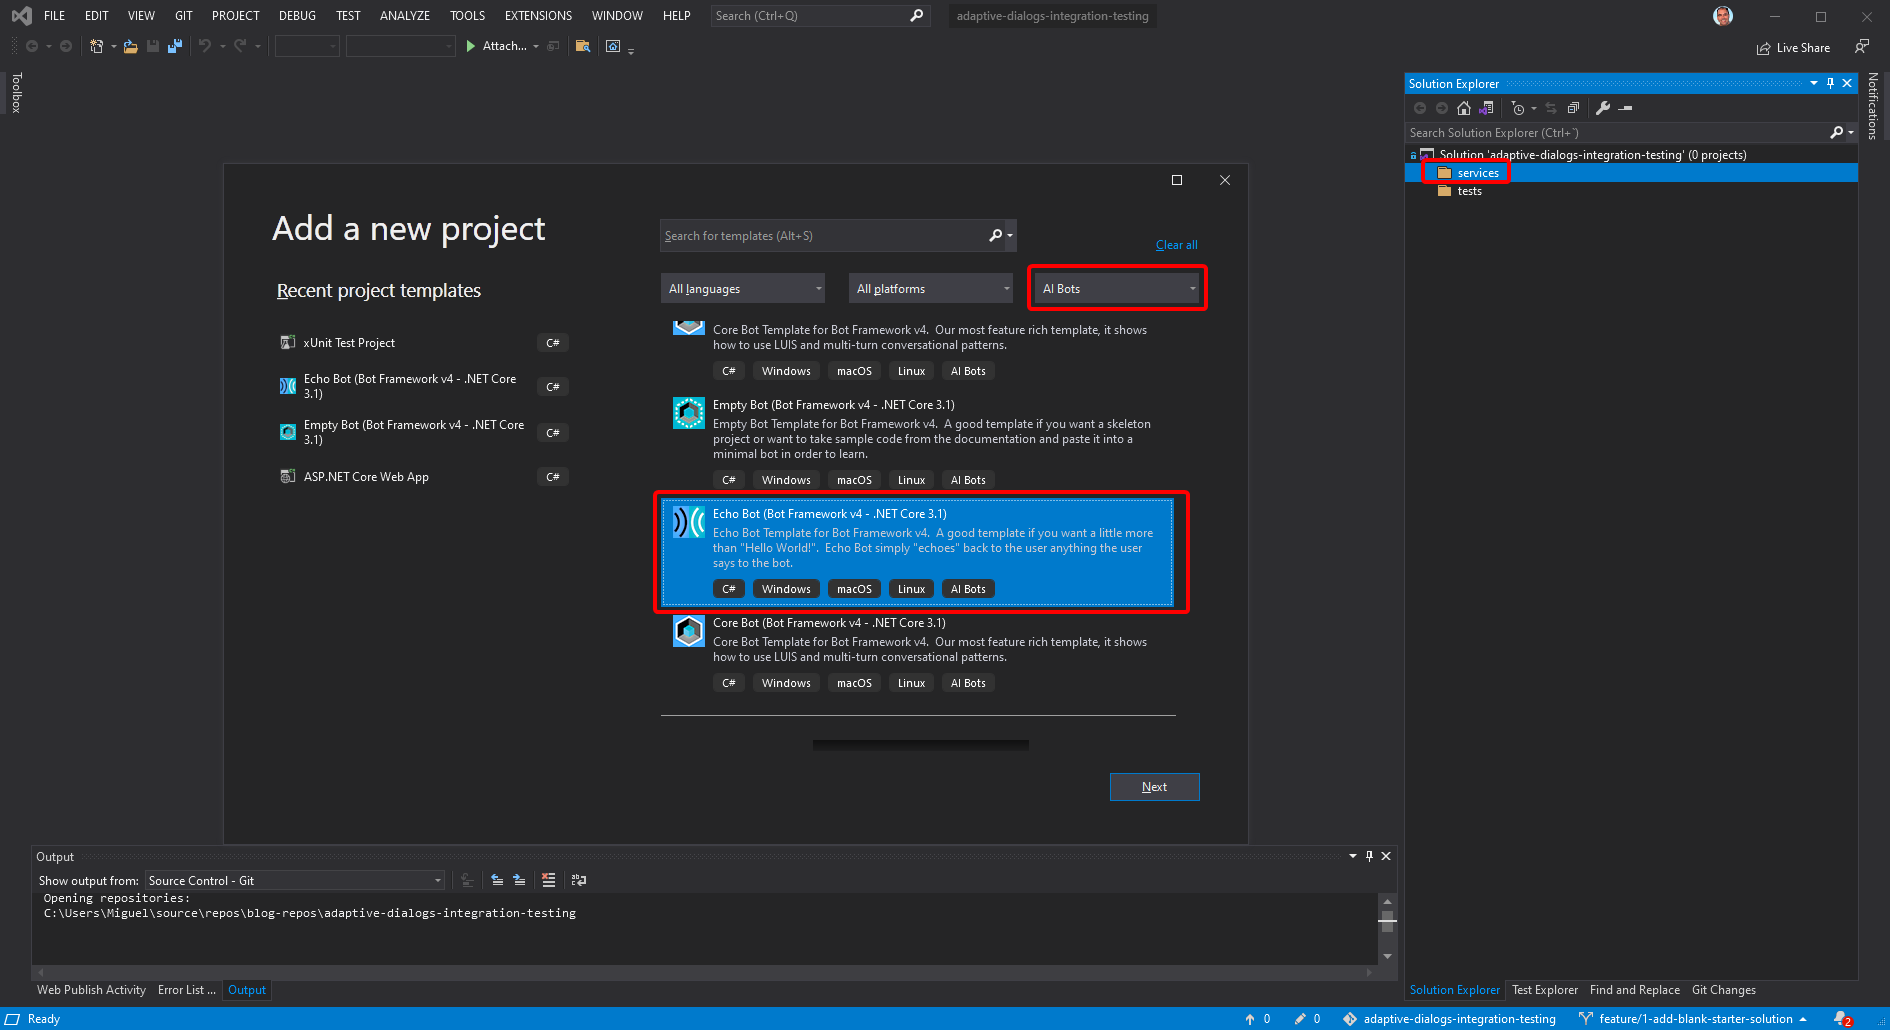
Create a template projact
Create a new project with the “Echo Bot (Bot Framework v4 - .NET Core 3.1)” template on the services solution folder:
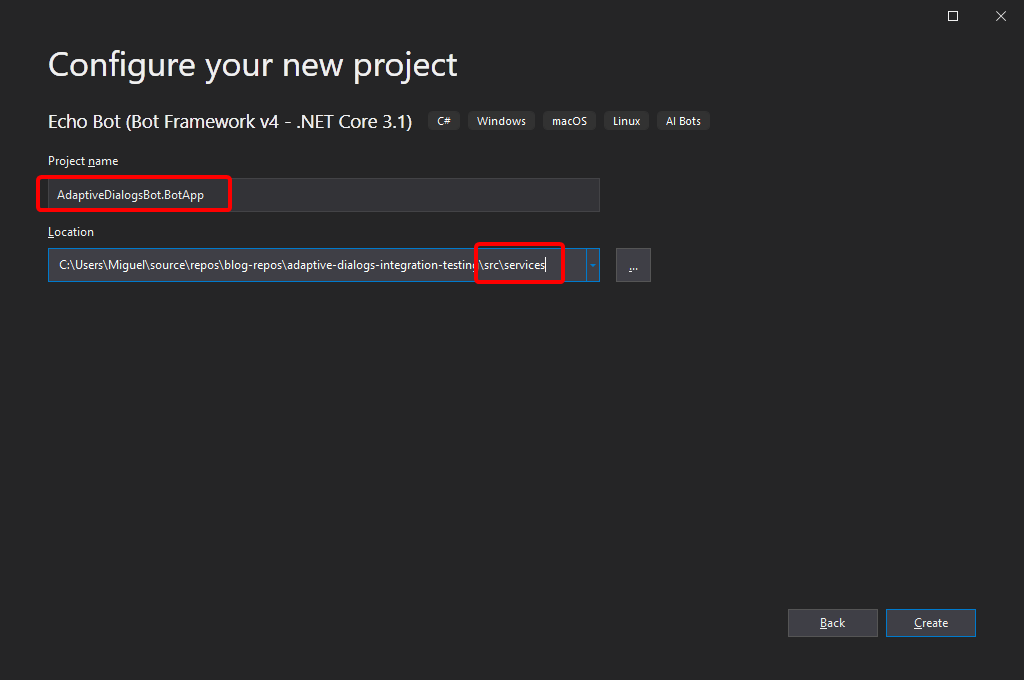
Save the project as AdaptiveDialogsBot.BotApp and add the services folder to the path to mimic the solution structure:
At this point you should be able to run the bot with the bot emulator, that you can download from the link in the web application home page:
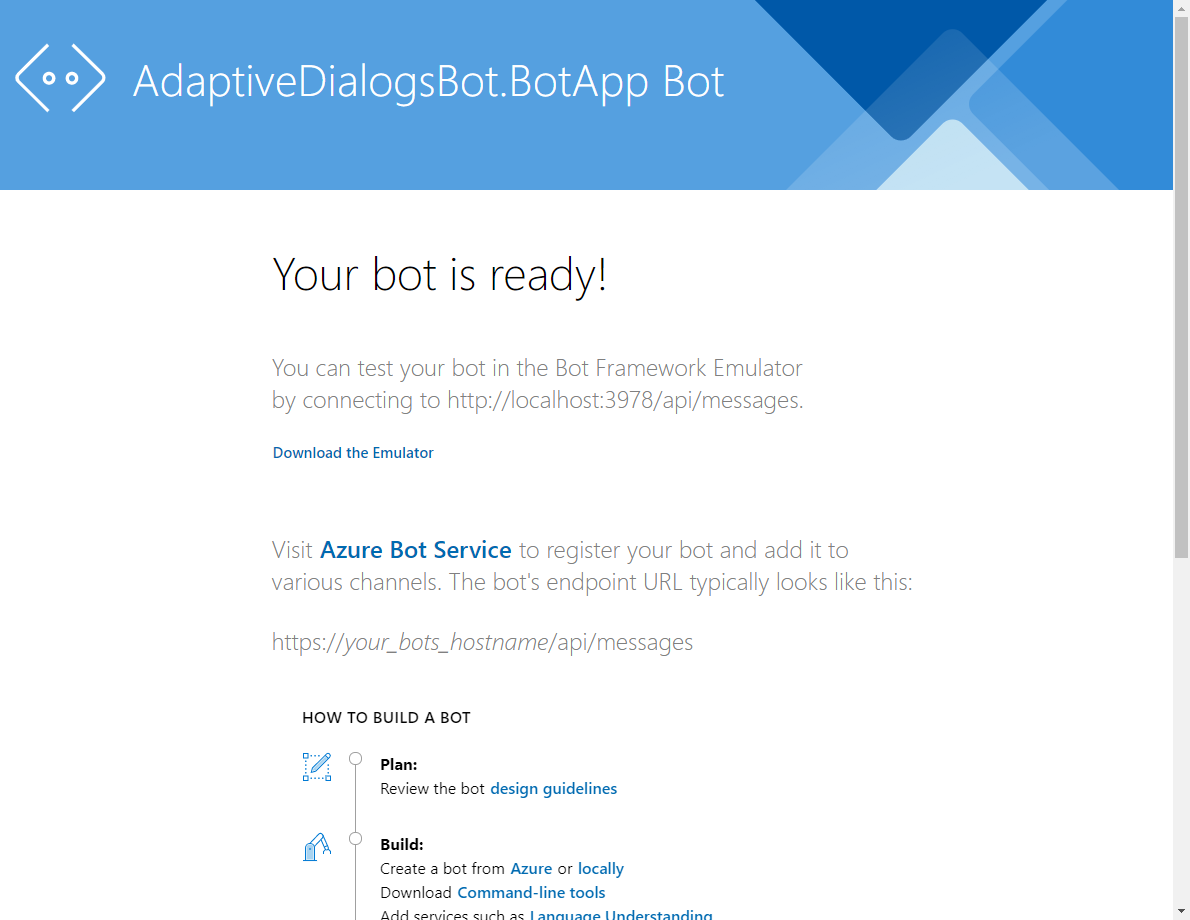
Just check for the latest release of the emulator.
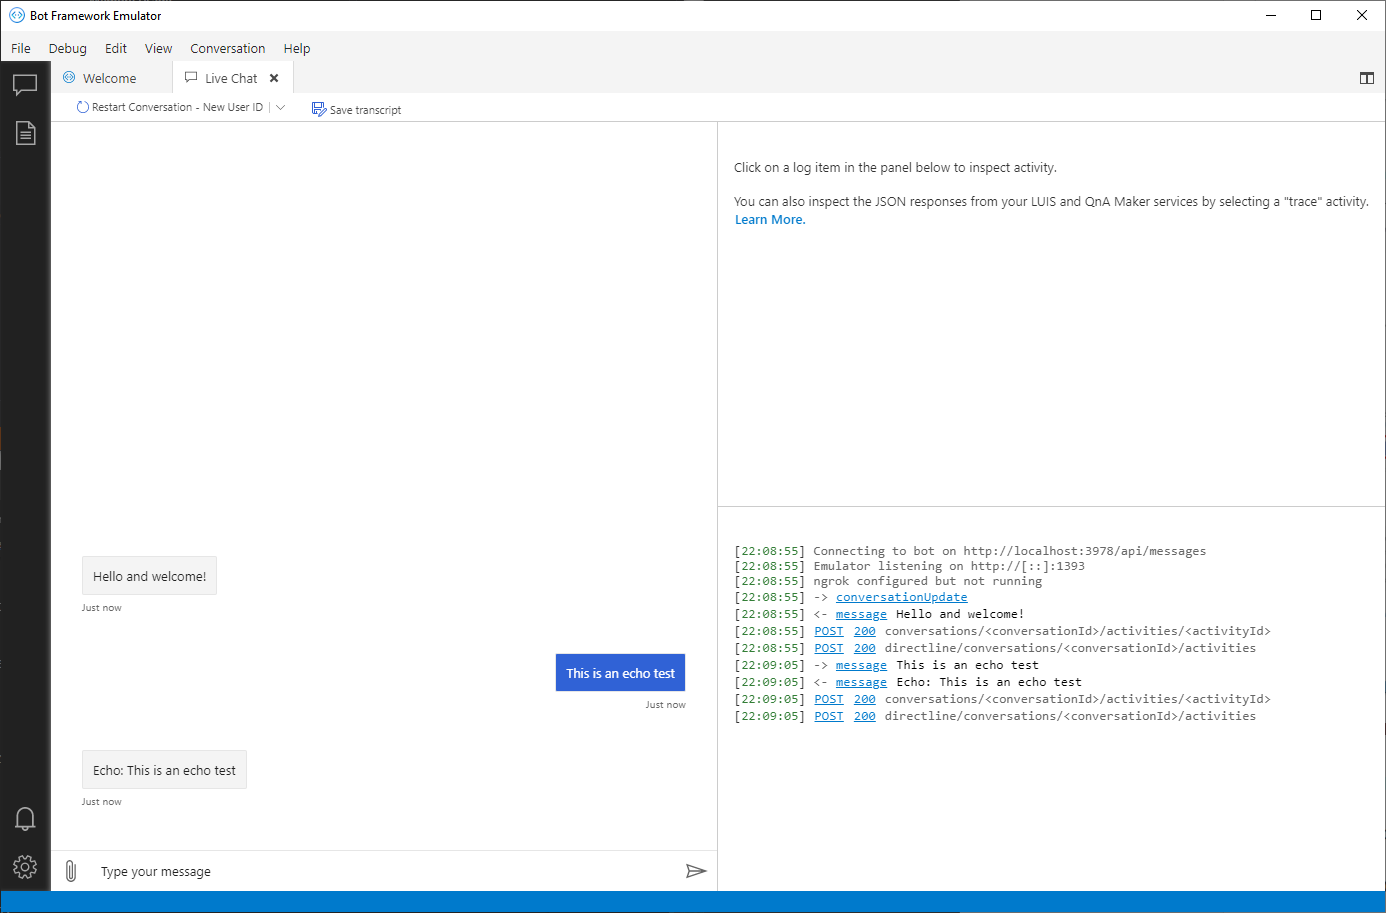
Once you have the emulator installed, open the bot at http://localhost:3978:
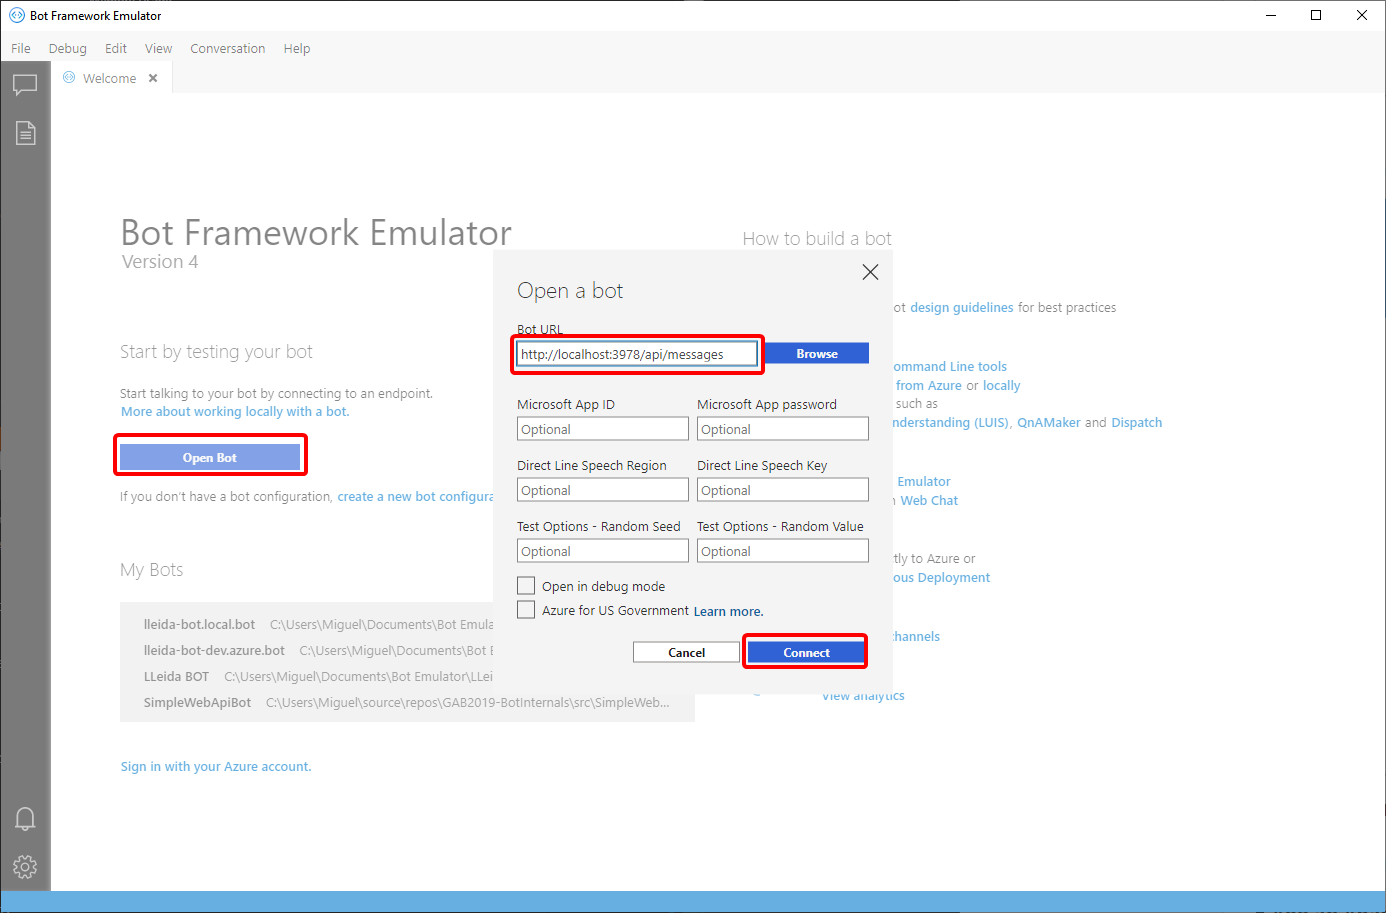
You should be able to check the bot is running and echoing back whatever you type:
1.2 - Add logging
We’ll use Serilog for logging and Seq as a centralized log server.
Serilog is an open source product and Seq is available for free for development and small deployments.
You can install Seq either on Windows or Docker, whatever suits you better.
Following the instructions in the Serilog.AspNetCore GitHub repo, with a few small changes highlighted below.
Install packages
Install the following packages:
Serilog.AspNetCoreSerilog.Sinks.SeqDestructurama.JsonNet
Update all packages to the latest stable release, except for the ASP.NET Core related ones, that should be the latest 3.1.x.
Add Serilog and Seq to Program
Add Serilog and Seq to Program.cs as shown next.
Update Main in Program.cs as follows:
|
|
In the previous code we:
- Added support to log JSon objects (line 6) when using the
@ObjectNamestructured logging template. - Added the Seq sink (line 8) to send log traces to Seq.
Next, update CreateHostBuilder as follows:
|
|
1.3 - Add a bot logging middleware
We’ll now add a simple logging middleware to the bot pipeline so we can log the activity details.
Create the logging middleware
Create the LoggingMiddleware class as follows:
|
|
In the code above:
- Notice we’re using
IMiddlewarefrom theMicrosoft.Bot.Buildernamespace (lines 1, 8).
Register the new logging middleware
Register the middleware in the AdapterWithErrorHandler class:
|
|
In the code above:
We add the logging middleware to the adapter pipeline (line 6)
Check the logged activities
If you run the bot and test with the emulator you should get something like this in Seq:
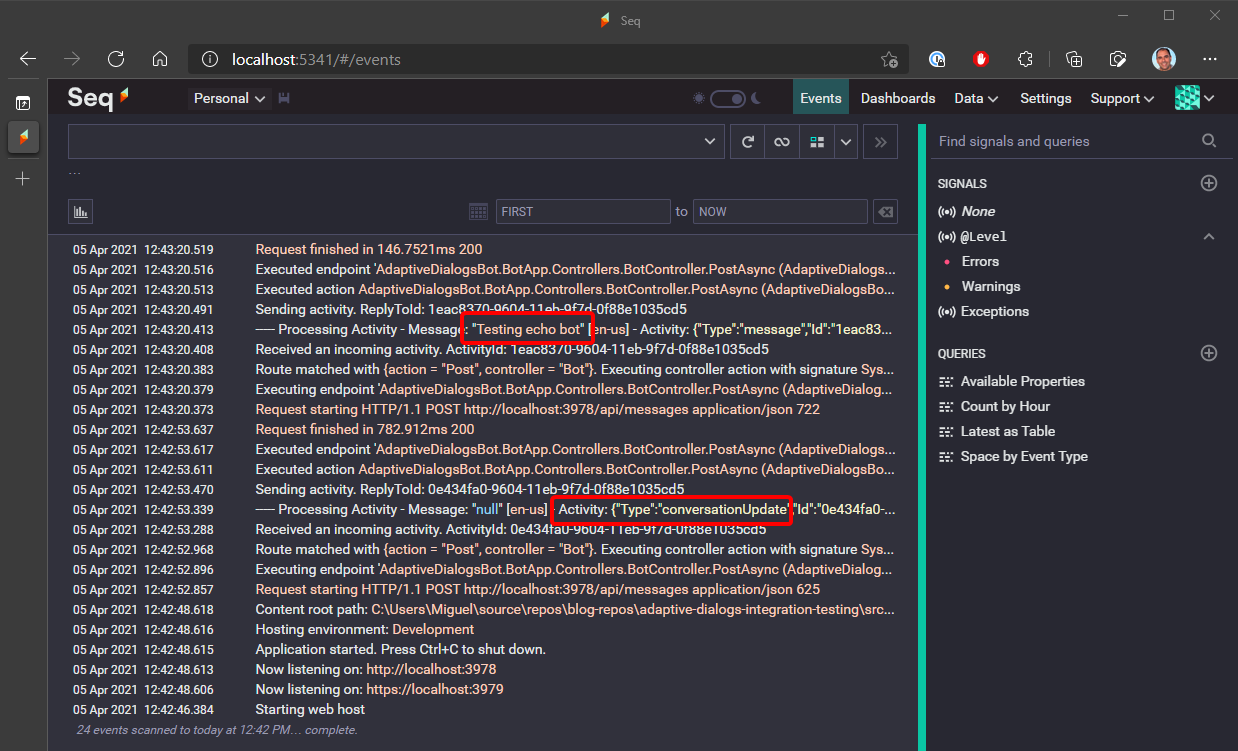
You can, (should 😉), expand the traces and take a look at what an activity looks like.
2 - Add a bot test project
In this step we’ll use ASP.NET Core’s integration testing support to create the first integration test for the echo bot. So we’ll:
- Create an xUnit Test Project
- Add the test server and other bot test-related classes
- Add the echo test case
- Do a little TDD
2.1 - Create an xUnit Test Project
Create a test project
Create a new xUnit Test Project in the tests solution folder, named AdaptiveDialogBot.BotApp.IntegrationTests, targeting .NET Core 3.1.
Remember to add tests to the project path, similar to what we did before, so the folder structure mimics the solution’s.
Add a reference to the AdaptiveDialogBot.BotApp project.
Install required packages
Install the following packages:
Microsoft.Bot.Builder.TestingMicrosoft.Extensions.DependencyInjectionFluentAssertions
Update all packages to the latest stable release, except for the ASP.NET Core related ones, that should be the latest 3.1.x.
Create the initial test class
Move the initial test class to a new EchoBotTests folder.
Rename the test class to EchoBotShould and update it so it looks like this:
|
|
2.2 - Add test server and bot test-related classes
We’ll roughly follow the Integration tests in ASP.NET Core official article on integration tests, and some “old” testing classes from the Bot Framework.
Create a specialized TestAdapter
Create the Helpers folder.
Create the BotApplicationTestAdapter class in the Helper folder with this code:
|
|
In the code above:
- You can see that in looks just like the
AdapterWithErrorHandlerthat we use in the bot project, only this one inherits fromTestAdapter(line 1). - It’s using the same logging middleware (line 6), because we also want to log the test runs.
Create a specialized WebApplicationFactory
Create the BotApplicationFactory class in the same Helpers folder with the following code:
|
|
In the code above you can see that:
- We’re inheriting from
WebApplicationFactoryreferencing the bot projectStartupclass (line 1). This allows us to use the originalStartupconfigurations, and change them here testing. - Since we don’t run any code from
Program.cswe have to add the logging-related code here (lines 8-16) - We’re are registering the new
BotApplicationTestAdapter(line 20). - We’re creating the
CreateScopemethod (line 26), that we’ll use in the tests methods to get classes from the DI container. - Again, since we don’t run any
Program.cswe have to ensure the log cache is flushed when the test completes (line 38), otherwise you’ll lose log traces.
Set up some test class infrastructure
Update the initial test class as follows:
|
|
In the code above:
- We set up the test class to accept a
BotApplicationFactoryin the constructor, injected as a class fixture by the test framework (line 1). - We create a DI scope in the constructor (line 8), so we can use the DI container.
- The class is created as
IDisposable(line 1) so we properly dispose the DI scope (line 30) using the Dispose pattern.
2.3 - Add the initial echo test case
So we finally update the test class to include the actual test case, as follows:
|
|
In the previous code:
- The
TestAdapteris obtained from the DI container (line 5). - The
EchoBotis obtained from the DI container (line 8). - The whole “conversation” is configured with some
TestFlowmethods (lines 12-16). - You can do simple reply assertions (line 14).
- And you can also do any complex validation with a lambda function or a delegate (line 16).
2.4 - Do a little TDD
So now that we have the whole test infrastructure set up, let’s do some Test Driven Development (TDD).
Create a failing test
Let’s create a new test case as follows:
|
|
This should be pretty obvious, so no details on the code above 😉
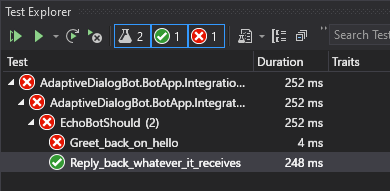
If you run the tests now you should get this:
Implement the code to pass the test
By adding just a little code to the bot you can make the test pass:
|
|
Again, pretty simple 😃
Takeaways
In this post we’ve learned how to:
- Create simple echo bot using the standard Bot Framework Templates for Visual Studio.
- Add basic logging to the bot web application.
- Set up basic integration tests for the bot, using ASP.NET Core integration testing classes.
I Hope you’ve found this post interesting and useful, and invite you to follow me on Twitter for posts and news.
See the next article in the series to learn how to convert this bot to an Active Dialogs bot, using Adaptive Expressions, Language Generation, and a simple Regex recognizer.
You are also welcomed to leave a comment or ask a question in the comments section below.
Happy coding!